


Simple Twister
We wanted a simpler, off-the-shelf tetrode twister that could be bought, built, and assembled by anyone. We took some tips from the "big brother" Twister that was already on Open Ephys, and made a few feature cuts. The simple twister is based on Arduino microcontroller hooked to a stepper motor, and we hope that our parts list helps you build your own semi-automated twister for about $300.
Amazon.com
- [$8.94] Hammond Manufacturing Clear Polycarbonate Enclosure
- [$4.95] Momentary Pushbutton Switch
- [$4.99] 10kOHm Resistors 1/4 Watt (100pcs)
ThorLabs.com
- [1$85.00] Aluminum Breadboard 6"x12"x1/2" with 1/4"-20 Taps
- [$26.00] Sorbothane Feet 1/4"-20 Thread
- [$10.82] Ø1/2"x12" Optical Post 1/4"-20 Tap
- [$6.77] Ø1/2"x6" Optical Post 1/4"-20 Tap
- [$12.64] Ø1/2"x6" Post Holder, Spring-Loaded Hex-Locking Thumbscrew
- [$9.76] Right-Angle Post Clamp Fixed 90° Adapter
- [$25.70] Slim Right-Angle Bracket with Counterbored & M6 Tapped Holes
- [$9.50] 1/4"-20 Stainless Steel Cap Screw, 1" Long, Pack of 25
Adafruit.com
- [$24.95] Arduino Uno R3
- [$19.95] Adafruit Motor/Stepper/Servo Shield for Arduino v2 Kit - v2.3
- [$14.00] Stepper Motor 200 steps/rev, 12V 350mA
- [8.95] Stepper Motor Mount with Hardware
Assembly
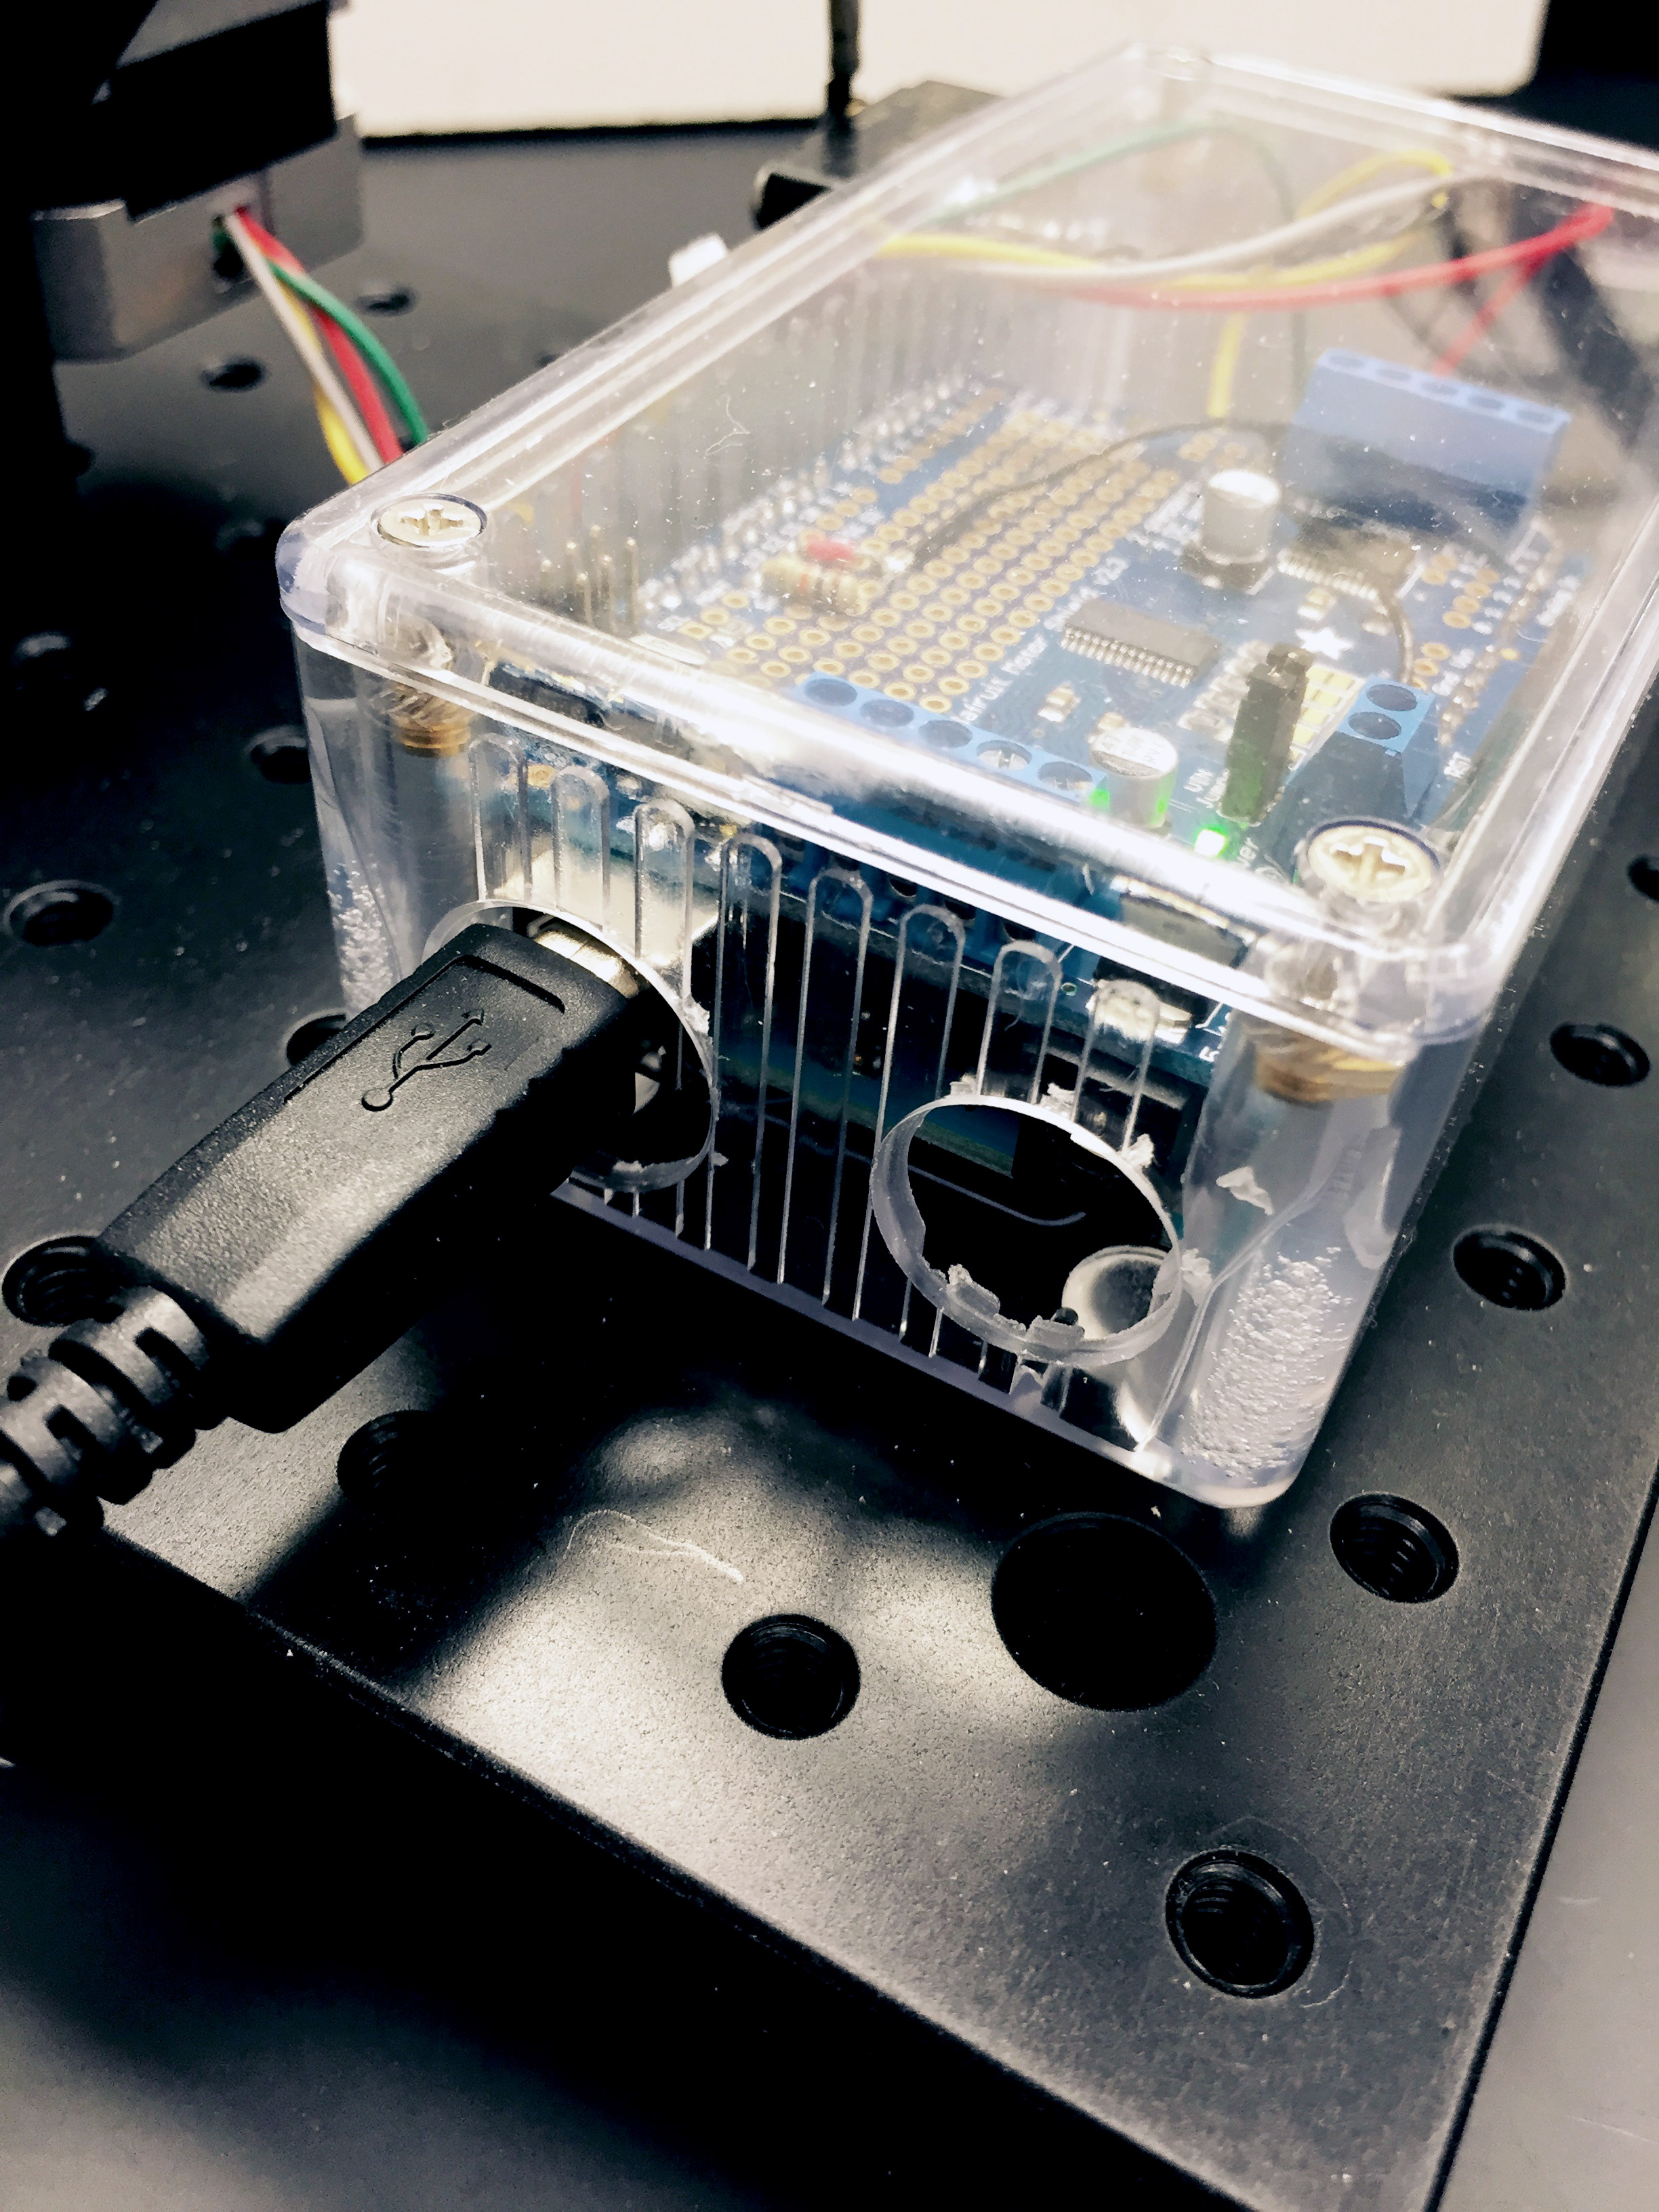
You mat need a few other parts, like hookup wire, a small needle, and some standoffs to mount the Arduino, but you might already have those. Let's get started with the Arduino.
- Head over to Adafruit's wonderful documentation on how to install the motor shield.
- Install a 10kOhm resistor between IO pin 12 and ground (see photo below), and install one end of the switch directly to pin 12, and the other side to 3.3V+.
- Download the Arduino Software.
- Clone our Tetrode Arduino repository on GitHub (or download the ZIP) and compile it onto the Arduino.
- Test the stepper motor by pressing the switch.


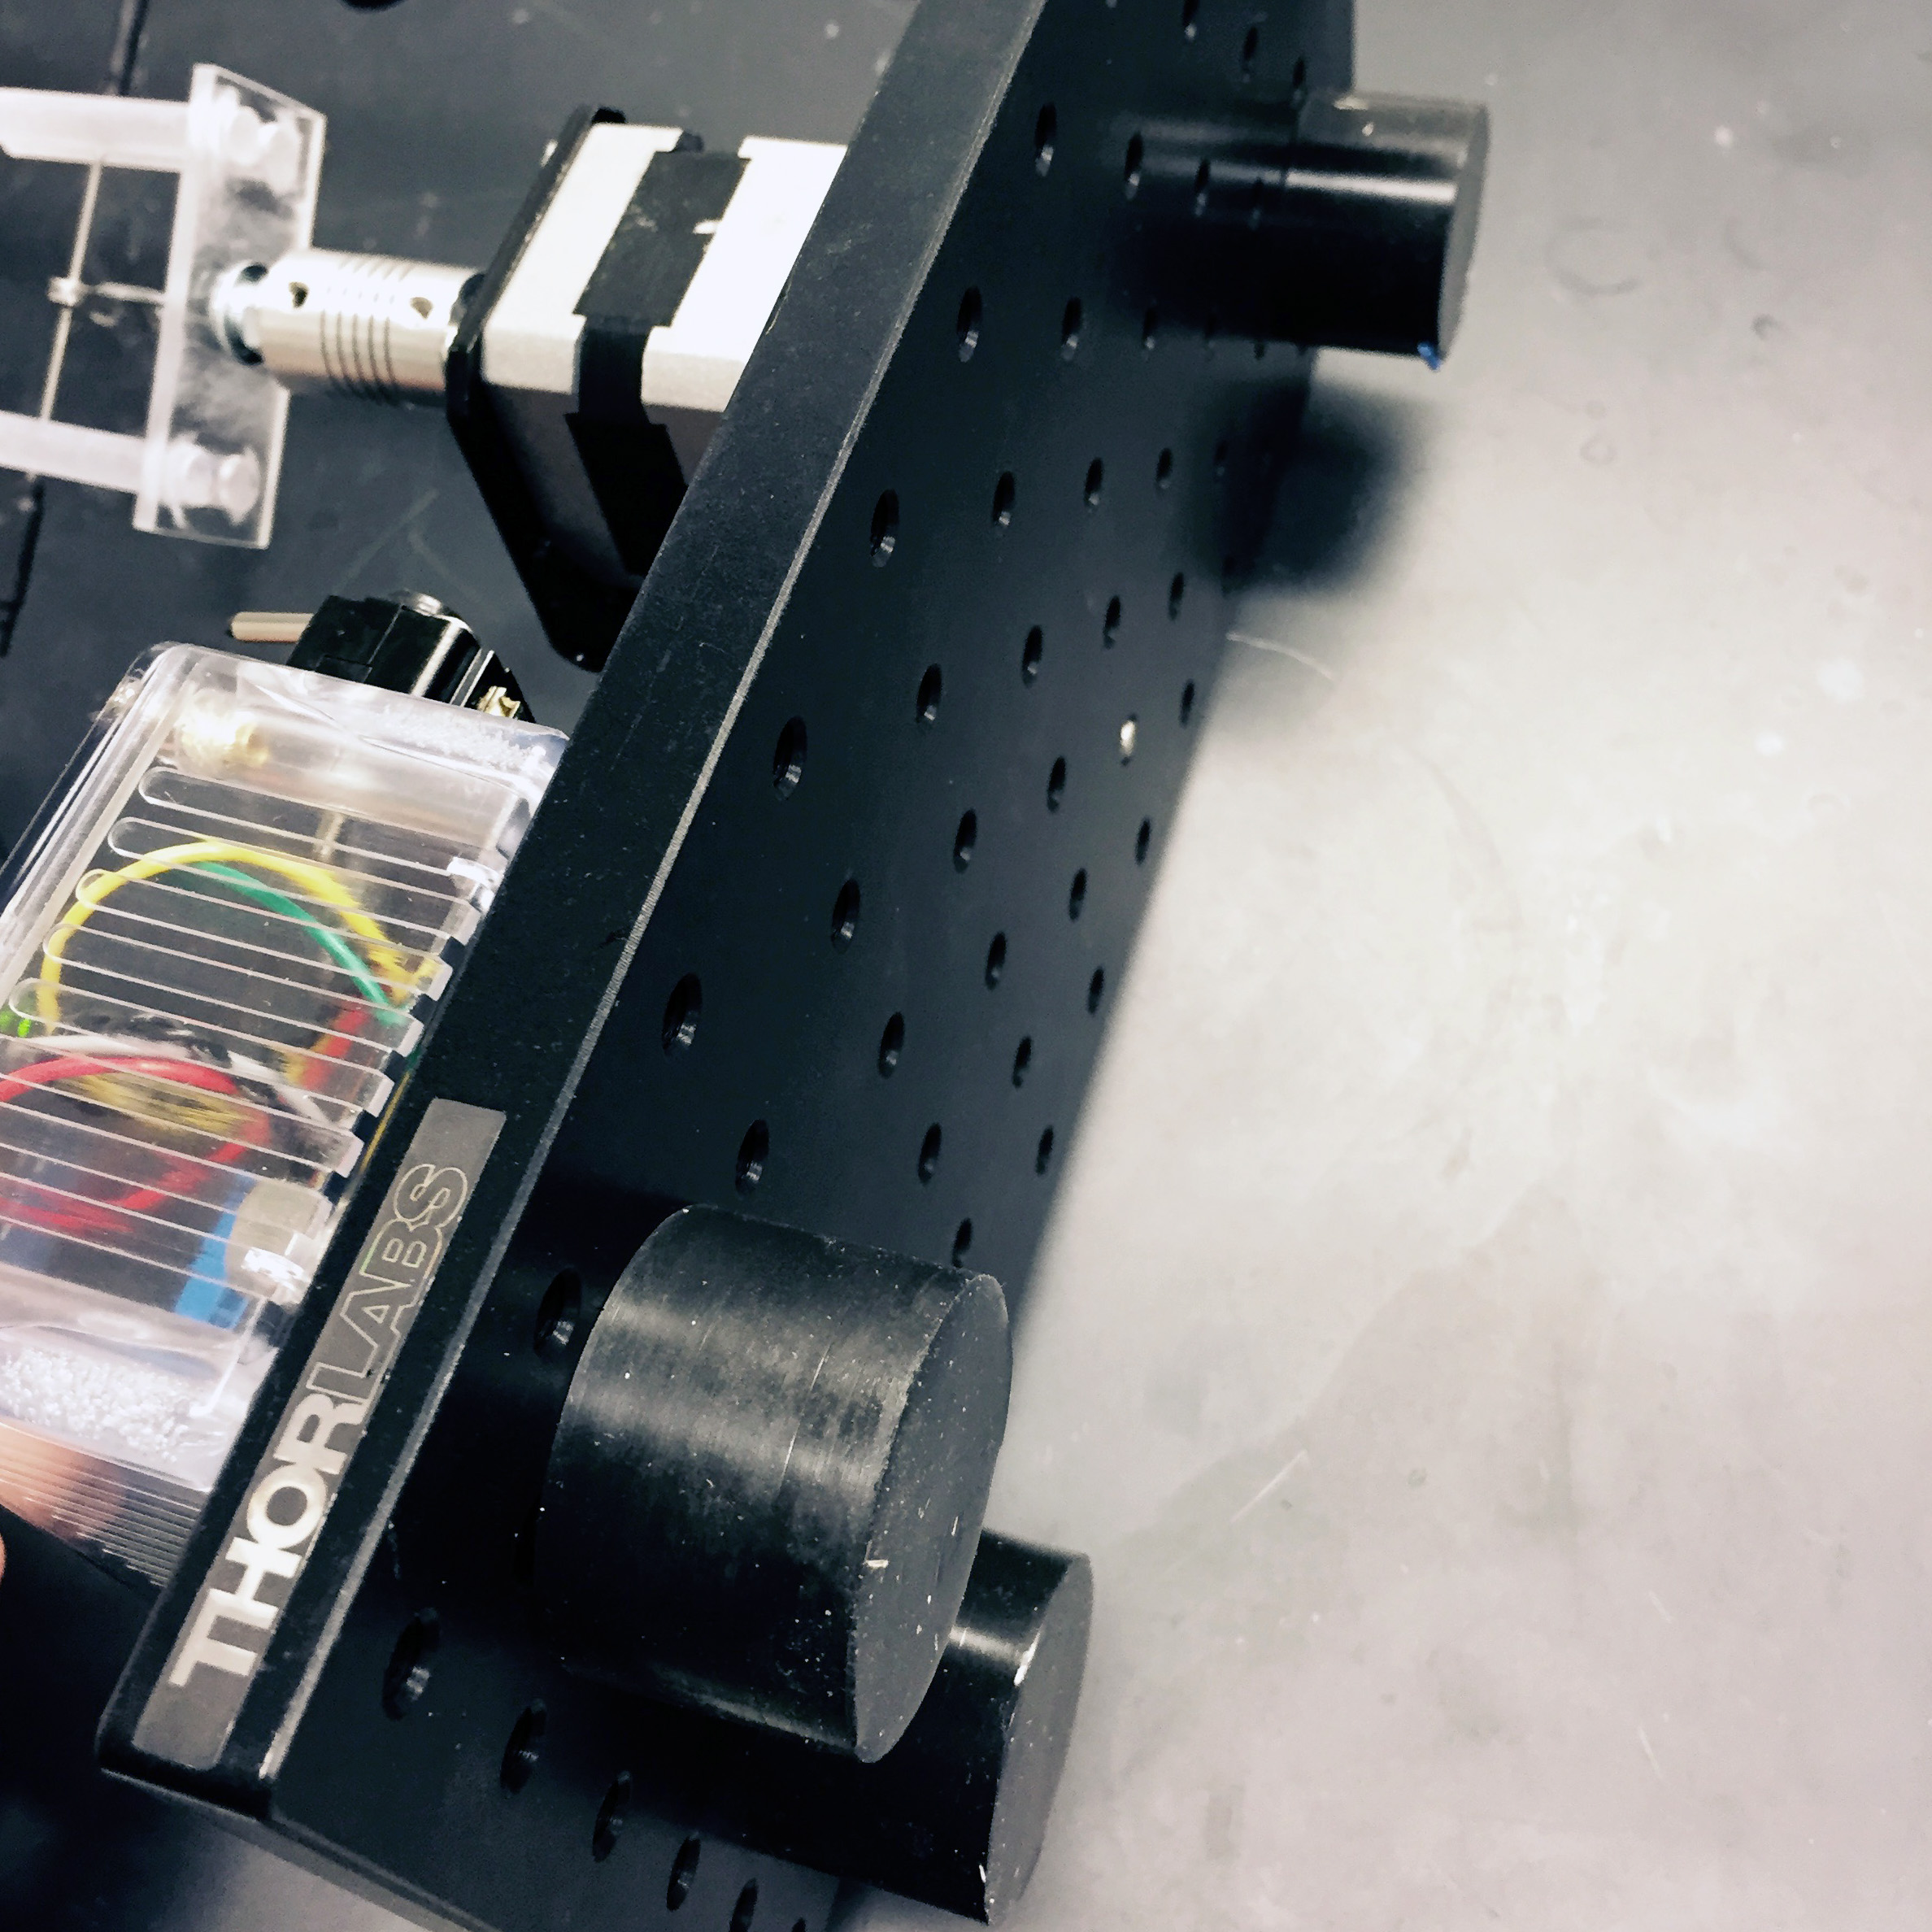
If you get the Arduino to run the stepper motor, all you have left to do is mount the components and stick a bent (and blunted) needle onto the 8/32" screw of the horizontal Ø1/2" post. You'll notice that we are leaving a few things up to you, which may change based on your abilities:
- We used the right-angle mount from Thor Labs to place the motor, but we had to drill two small holes in the steel motor mount for it to work
- The momentary switch shown is different than the one recommended in the parts list, it's all we had lying around and can be found at All Electronics
- You will need to decide how you wan the tetrode clip to interface with the motor, and you can reference the original Open Ephys Twister for 3D parts, or do what we did, and scrap one together
Usage
The momentary switch will spin the motor 80-turns in one direction, and 20-turns in the other, and then stop. These parameters can be adjusted in the INO file provided in Step 4 (above). We found that the stepper motor introduces a slight vibration into our plastic "goal posts" used to hold the tetrode clamp, although we were able to dampen this using some rubber heat-shrink tubing. It is recommended that you unplug the Arduino from the AC charger when the spinner is not in use.
We hope this serves as a starting point for making your own spinner, and please share with us any innovations you have made in your quest for the perfect tetrode.
Matt Gaidica | mgaidica@med.umich.edu